 As we complete transferring clients to our new servers, the last stage is always the setting up of email; this post shows how to set up email for Google Apps.
Note that menu options are show as a chain; so Tools->Options->Advanced would mean find the menu option Tools, then the menu or tab option Options, then the menu or tab option Advanced.
1. Go to the menu open Tools->Account Settings
2. Click on the EMail tab, and select New. If you are modifying an existing email account, select it from the list, and then go to step 6 in these instructions.
3. Select Microsoft Exchange, POP3, IMAP or HTTP and click Next
4. On the Auto Account Setup window, check the Manually configure server settings or additional server types and click Next. Note that KP Direction and Google do not support the Automatic Setup option.
5. Select Internet E-mail option and click Next.
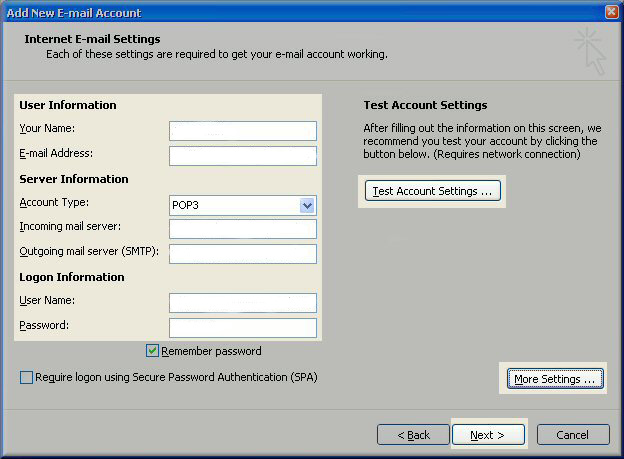
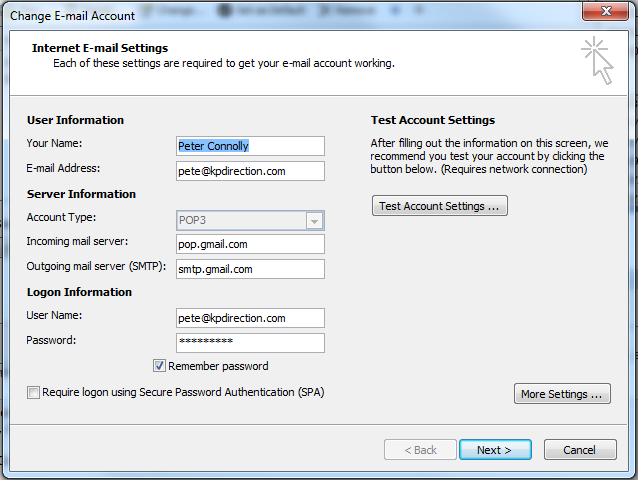
6. Fill in the following fields. Change example.com to your domain.
- Enter Your Name as you want it to appear.
- Enter your full email address username@example.com in the Email address: field.
- Select POP3
- Enter pop.gmail.com in the “Incoming mail (POP3, IMAP) server:” field.
- Enter smtp.gmail.com in the “Outgoing mail (SMTP) server:” field.
- Enter your username username@example.com in the “Account name:” field.
- Enter your email password in the Password: field.
7. Perform the following steps:
- Click on More Settings…
- Click on the Outgoing Server tab.
- Check My outgoing server (SMTP) Requires Authentication.
- Make sure Use same setting as my incoming mail server is also checked.
- Click on OK.

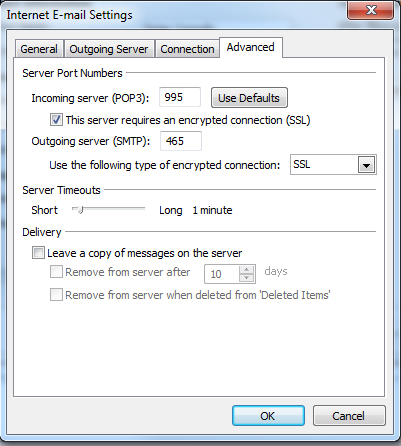
8. Click the Advanced tab, and change the settings as follows;
Incoming server (POP3): 995
Tick ‘This server requires an encrypted connection (SSL)
Outgoing server (SMTP): 465
‘Use the following type of encrypted connection’: Select ‘SSL’
9. Click OK, then Test Account Settings
10. Congratulations. You have finished the setup of your email account. Click Finish to close the setup wizard.


